I get lots and lots of questions about how I put together the style/fashion boards I feature frequently. I try my best to explain it via email but I figured a good old "how to" is the way to go. So for all of you inquiring minds, here are the simple steps I use.
First, I use Microsoft Word for Macs. I am sure a newer version of Word for PCs is pretty much the same.

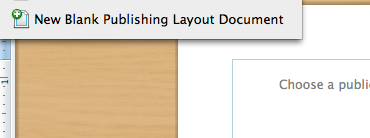
Select the Blank Publishing Layout Document...
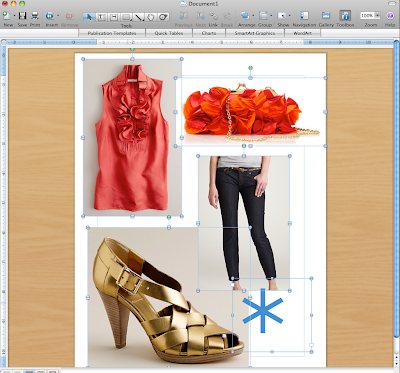
Once you have the blank publishing layout before you, drag and drop the photos you want to use onto the page. It's easiest to drag and drop photos saved to your desktop. I used pictures that I screen captured off of J.Crew's website. Screen capturing can be hard on PCs but you can always right click on a picture you want to use and click "Save as" or "Save picture as" and save the image to your desktop. From there it's easy to drag and drop onto your layout.
Arrange the elements (pictures, text, shapes) they way you want them. Here I arranged a simple style board. You can get as complicated or as simple as you want. Also you might want to add a background or a border if you chose. I'm keeping it simple for this lesson.

Using your mouse or a shortcut key, select all of the elements on your page.
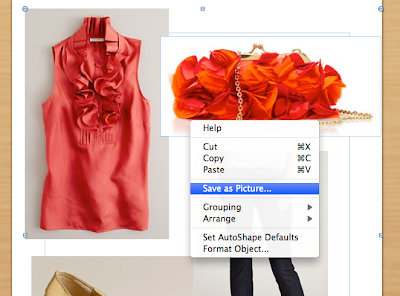
Once all of the items are selected, click "Group" to group all of the elements together. This will make all of your elements into 1 big element. If you need to change anything you can always "Ungroup"...

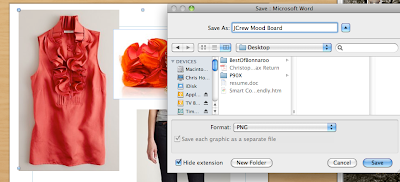
Ctrl-Click (or right click on PCs) and click "Save as Picture" then name and save the file...
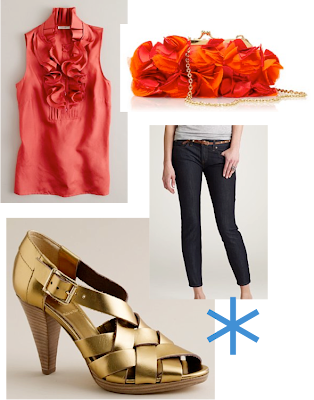
The Final Product...